Want to be able to connect to your computer while your on the road, or even while your in the other room? XP has a really cool feature called Remote Desktop.
Remote Desktop, included with Windows XP Professional, enables you to connect to your computer across the Internet from virtually any computer, Pocket PC, or Smartphone. Once connected, Remote Desktop gives you mouse and keyboard control over your computer while showing you everything that's happening on the screen. With Remote Desktop, you can leave your computer at the office without losing access to your files, applications, and e-mail.
You need three things to create a remote location:
You need three things to create a remote location:
1. | Microsoft Windows XP Professional must be installed on the computer containing the files and programs that you want to access from a remote computer. The computer must also be part of a corporate network in which Remote Desktop connections are permitted. This computer is known as the host. |
2. | The remote computer must be running Windows 95 or later. This computer must also have the Remote Desktop Connection client software installed. The remote computer is known as the client. |
3. | Both computers must be connected to the Internet through a VPN connection. Note: If you're not connecting to the host computer through a VPN, you'll need to use the actual IP address of the host computer instead of the computer name. |
To set up the Remote Desktop, start with the host computer, which in this example is your work computer.
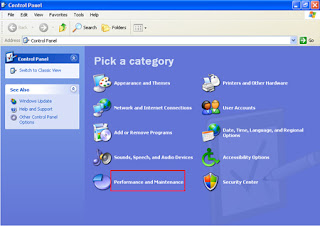
Verify that you are signed in as the administrator. Start Control Panel, Performance and Maintenance Click System Click the remote tab, and then allow users to connect remotely to this computer, then Ok You will then want to make sure you have the firewall setup to allow this exception So, back to control panel and then security center Under manage securityl settings, click for firewall Make sure the Don't allow exceptions box is not checked Click the exception tab, and verify the remote desktop is checked, click ok and now this computer is ready to act as a host. You only need to write down the computer a name, so the client computer can indicate the computer name it wants to connect to. To do this In Control Panel, click Performance and Maintenance, click System, and then click the Computer Name tab. Write down the full computer name, and then click OK. Close the control panel, and leave this computer on. Connect your remote computer to the host computerTo connect your home computer, which is the client (or remote) computer to your work (or host) computer, follow these steps:
| |||||||
To end your Remote Desktop session:
1. | Click Start, and then click Log Off at the bottom of the Start menu. |
2. | When prompted, click Log Off. |
Good Luck!
Computer Gal
No comments:
Post a Comment